
I am thrilled that our house makeover/remodel is coming to a close. I wanted to share half of the finished family room in the basement... only half because the south wall is a built-in entertainment center and it isn't ready yet:) Below is the "before." Technically this was a "finished" basement however the first time we updated we did the bare necessities (painted the cement and got new carpet.) So we "started over" and made it much more functional. We drywalled the walls and ceilings... oh and added the boy bedroom for one more bedroom.

 I want our home to be beautiful and current but still reflect us so I created this brag wall. It has a name plaque for each child and their latest "art."
 All it takes is a little vinyl lettering of your choice, any kind of scrap wood or pressed wood painted to match your decor and wire to hang them.... oh and a little tacky glue:)
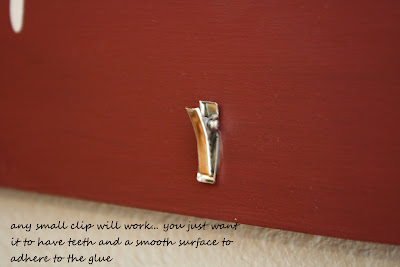
 I purchased the below pictured clips in bulk on ebay... I use them for hair accessories and a few other things too... cost $5 for 100... great deal!
 Be sure and let the glue dry over night!!!
 The kids love their brag wall and it frees up a little bit of refrigerator space:)
 Linking up to...


 We drywalled the walls and ceilings... oh and added the boy bedroom for one more bedroom.
 I want our home to be beautiful and current but still reflect us so I created this brag wall. It has a name plaque for each child and their latest "art."
 All it takes is a little vinyl lettering of your choice, any kind of scrap wood or pressed wood painted to match your decor and wire to hang them.... oh and a little tacky glue:)
 I purchased the below pictured clips in bulk on ebay... I use them for hair accessories and a few other things too... cost $5 for 100... great deal!
 Be sure and let the glue dry over night!!!
 The kids love their brag wall and it frees up a little bit of refrigerator space:)
 Linking up to...


