Showing posts with label accessories. Show all posts

Monday, June 20, 2011

Another Freezer Paper Stencil Tutorial... with Cuteness!

I love to attempt original photos of my children. When I became pregnant a 4th time and realized I was going to have 4 children, six and under I was definitely overwhelmed but knew it would make the cutest card:) haha... that must make me completely insane! Most people stress about affording another child and things of that nature (I leave the worrying up to the hubs). I worry about things like making sure their are equal number of photos of each child hanging on the wall and making sure I take each one individually to Disney on Ice... you know important stuff like that:)

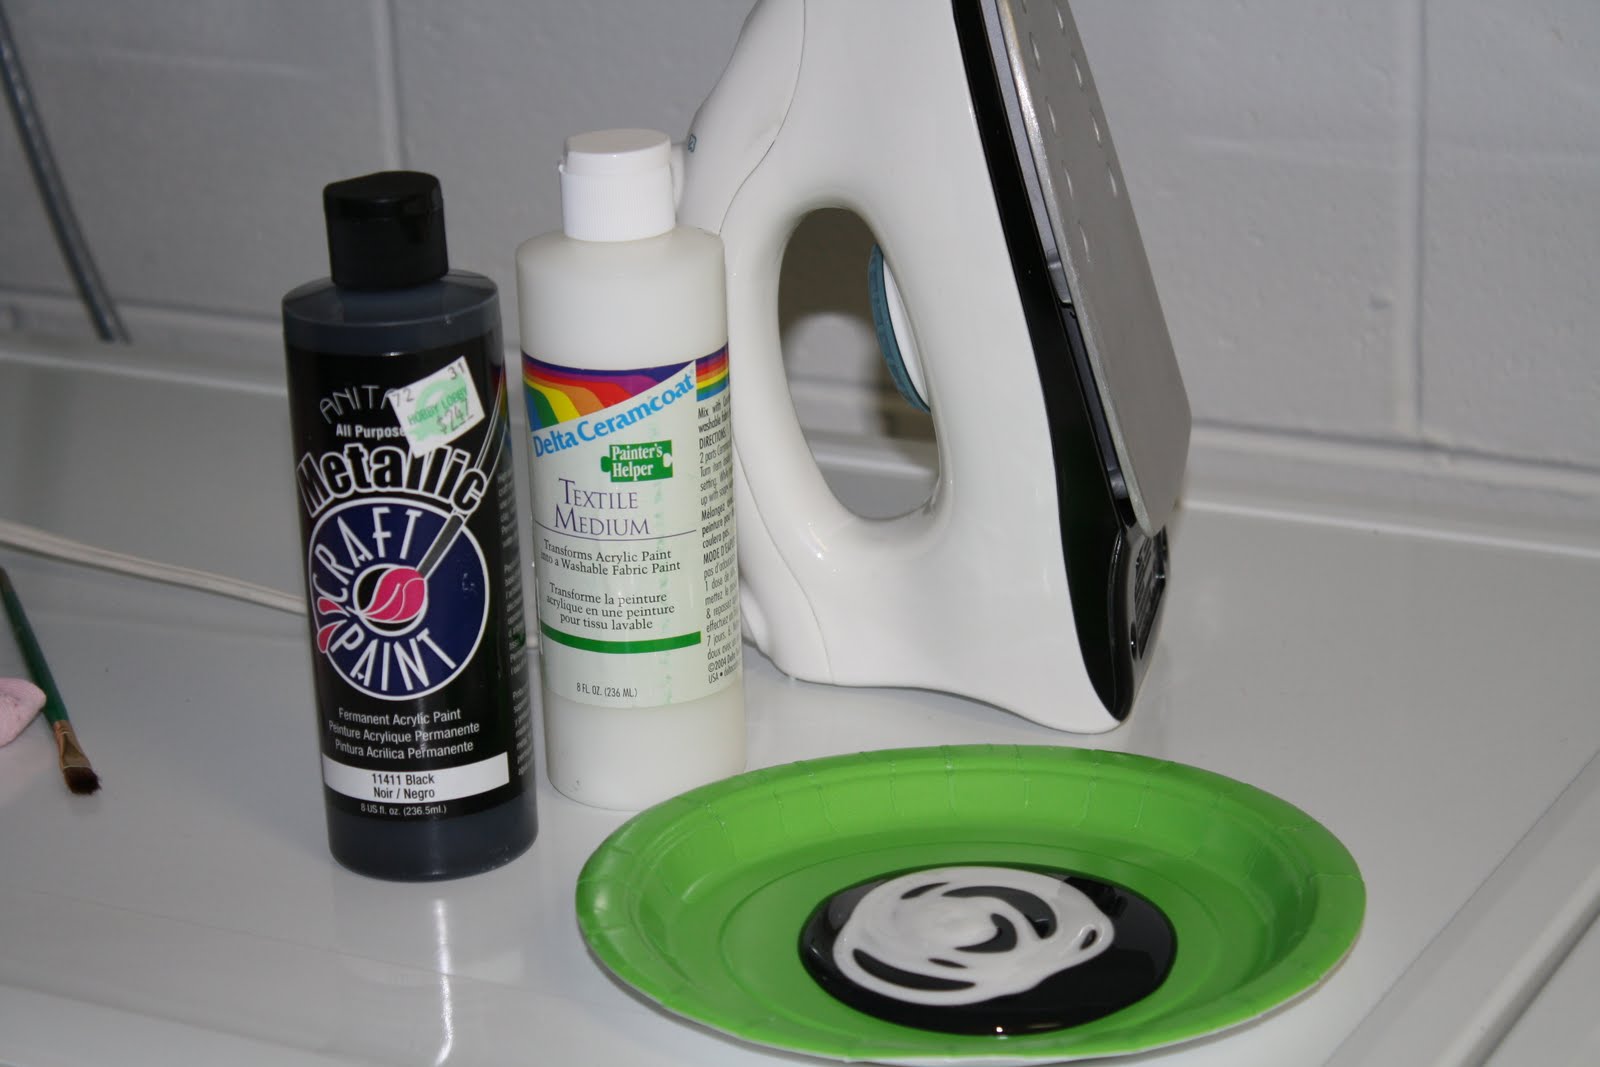
I have done another post on freezer paper stenciling, you can view HERE. This one is more or less the same thing:) I just can't get enough freezer paper stenciling... you need Freezer Paper, a pattern, knife, mat, textile medium, craft paint, and iron. With the pattern taped to the mat, cover with a piece of freezer paper, shiny side down and tape the freezer paper down as well.

Using the knife, carefully cut around your pattern, creating a stencil out of the freezer paper.

You will need to heat the iron without steam. WITHOUT is important. Mix your paint and textile medium. (The textile medium is sold at craft stores and allows you to wash your garment.) The recipe is two parts paint, one part textile medium.

You will want to take a blank piece of freezer paper and placing it shiny side up, gently iron it to the inside of the shirt so your paint doesn't bleed through. Once you have that in place, lay your stencil down where you wish to place it and then carefully iron the freezer paper stencil onto your garment, shiny side down... this creates a temporary bond.
Take a paint brush and paint on your paint in one thick even coat. Allow this to sit 1 minute... make sure the entire area is covered.
Very carefully pull off the stencil. Allow the paint to dry overnight or at least 6 hours.
Just for fun I wanted to trace mine in glitter.
The bottle said it would hold up in the washer but not the case. However it still made for cute pictures.
So cute... so easy! BTW... the plain white tees came from Hobby Lobby.

Monday, June 13, 2011

Coffee Filter Lamp Shade Tutorial

I know what you are thinking... I've seen that before:) I can't deny that... however after spending days gluing coffee filters to a lamp shade I had to post a tutorial... I just had too!
My 2-year-old is sorta girly but not in an over-the-top princess kind of way... in a sweet way. I have been looking for a matching fabric to cover her lamp shade when I came across these coffee filter lamp shade coverings. There are several posts out there, however some of the tutorials are rather mediocre so I decided to post my way. Hope you enjoy and if you decide to create one, I suggest a bottle of wine, and a friend or two, to ease the monotony:) Enjoy!


Above is the before of my plain old lamp.
Picked up a pack of these at the market. (turned out I needed two)
Individually flatten each one out,
then fold in half,

then fold that half into thirds,

you will have a slice of pie looking thing,
then fold your tip up in half again and place hot glue in the gray areas as shown,

start at the bottom and get to gluing; fill in the holes as you glue upwards; try to consciously make sure you are working upwards evenly. About half way through mine I was getting tired and started spacing more... and you can tell. I would say start out spacing generously because you can always come back and fill in the holes. When you get close to the top, do a few layers where you turn the triangles downward. When your rows from the top and bottom meet you will have to trim the triangle tips off before gluing. I did about two rows this way. When you are through if you see any holes just fill in here and there. This small shade took 250 filters and 10 glue sticks:) I love it though and it fits into the decor of my daughters room perfectly.


Friday, May 13, 2011

Emergency Clutch Tutorial...so cute!

Saw this post a few days or so ago on Eighteen25's blog. Since I'm having a new baby soon I thought I should make a few... one for the car, diaper bag, hubby's car... you can never have enough band-aids, motrin, or chapstick when everywhere you go, YOU GO with children:) The original tutorial can be found HERE. I modified the original just a bit...
First of all... I live NOWHERE near a Target so I went to the next best thing... Dollar General... haha! Also I used sandwich size baggies instead of snack size baggies. I cut some scrapbook paper scraps and filled the bottom half of the bag just for a little extra cuteness...
The scrapbook paper is subtle but makes for cute dividers:)


I definitely like the Target pot holders, but for the Dollar Store... these aren't bad and only $1.

(the above photo belongs to Eighteen25)


Love that blog!!!

linked to...


Friday, April 8, 2011

Flower Tutorial and more...

My name is Tiffany and I am an addict... to fabric flower making that is... I do seriously have a problem as you can see from the collage below.... I'm sharing my latest masterpiece with blogland today. My mother also has an addiction... she spoils my kids with super cute outfits.

My niece's birthday is coming up and I wanted to accessorize her outfit, which matches the one my daughter is wearing at the bottom of this post... from www.kellyskids.com... I'm warning you... don't visit if you don't have deep pockets though... way too cute!!! You'll need a pair of flip flops (these are $1/pair at the dollar store) fabric, felt, buttons, ribbon, hot glue and scissors. To begin with... I traced around the lens cap of my camera and made a pattern. (For larger flowers trace around a larger circle, like a glass or jar lid).. these are for an almost-2-year-old and they are plenty big
For each of the shown flowers you'll need four circles... so stack and cut
Next cut a small piece of felt for each flower... about the size of a 50 cent piece
Take one circle at a time and fold in half like a taco...then fold again into a one-fourth, put a dab of hot glue in the middle when you fold the second time
take another dab of hot glue and place it on the felt, then adhere your fabric
repeat in whatever pattern you like...
for the flower's center, I chose buttons, but the variations are endless...
next you'll want to dress up that $1/pair of flip flops... start with some ribbon and begin wrapping the strap... as you go dab hot glue every little bit to make sure it stays. (Strips of fabric will also work instead of ribbon)
I used quite a bit of hot glue because this ribbon was thick... like every time I went around:)
This is what the wrapped straps will look like... next
cut two more small pieces of felt...
wrap those around the straps as well... use lots of hot glue and make sure the felt is glued to itself...this will keep everything secure once your toddler starts running in these puppies...
place a large dollop of hot glue on the finished flower and center it on the flip flop... make sure the felt of the flower is glued to the felt on the flip flop... this is a very secure bond... almost like gorilla glue.... seriously! Felt on Felt is very strong!
Tah dah... glammed up dollar store shoes!... I couldn't stop there though... I wanted to make a matching headband...
to begin I shrunk the pink flower size just a tad... but kept the white the same size as used for the flip flops
create a bottom layer with the slightly larger circles and then with the slightly smaller circles glue and place the new "petals" on the seams of the bottom layer
Isn't that such a pretty flower...
Just like with the flip flops wrap your headband in felt using quite a bit of hot glue
Place a large dollop of hot glue on the flower and secure it to the headband.
Ahhhh... isn't that sweet!

Photo shoot with Ladybug #3... she says "cheeseburger"
And the sweet little toes... just because...
Hope you enjoyed another LONG tutorial from me:) For a slightly larger flower and with more petals visit The House of Smith's Blog ... just click the link House of Smith's