Showing posts with label kid crafts. Show all posts

Friday, February 10, 2012

How to make Chocolate Suckers... Mustache Style

Pin It I love taking fun photos, and crafting, and blogging, and cooking, and.... the list goes on!  If you combine all of the previously mentioned loves you get an activity and craft that looks a little something like this... read on!
Chocolate Suckers are a cinch to make, who knew?  Not me!  I was looking for a cute idea to top last years super cute Valentine's when I came across the new mustache "fad" ... I really felt I must go a little above just the photo though.  I searched and I found these cool sucker molds from Wilton.  Originally I was going to try and make hard candy style suckers but it became clear that chocolate was the way to go.
Start with the molds... found at this website.
 Obviously you will need some chocolate... for suckers you'll need the little wafer style.  Wilton makes some, Hobby Lobby sells these, Walmart, and I'm sure other places do too... I ordered mine from Wilton when I bought the molds.
 These are sooooo easy.... start by pouring the wafers into a Ziploc bag.  Then you microwave on your defrost setting for 1-2 minutes at a time.
 While the wafers are in the microwave, wipe down the molds with a paper towel and a dab of vegetable oil.
 After every minute or two in the microwave, remove the bag a knead gently.  Continue until your chocolate is melted.
 Just like frosting a cake, cut a tiny little tip off one corner of the bag.
 Fill the mold half way and then add a stick.  Roll the stick and get the whole thing covered with chocolate.  Then fill the remainder of the mold.
 Allow the children to suck the last tinsy tiny big of chocolate out of the bag. 
 Gently tap on the mold to get the surface to smooth out.  Then refrigerate for 5-10 minutes.  Once the chocolate is hard, carefully pop the sucker out.
 Be sure and have a little fun with this.
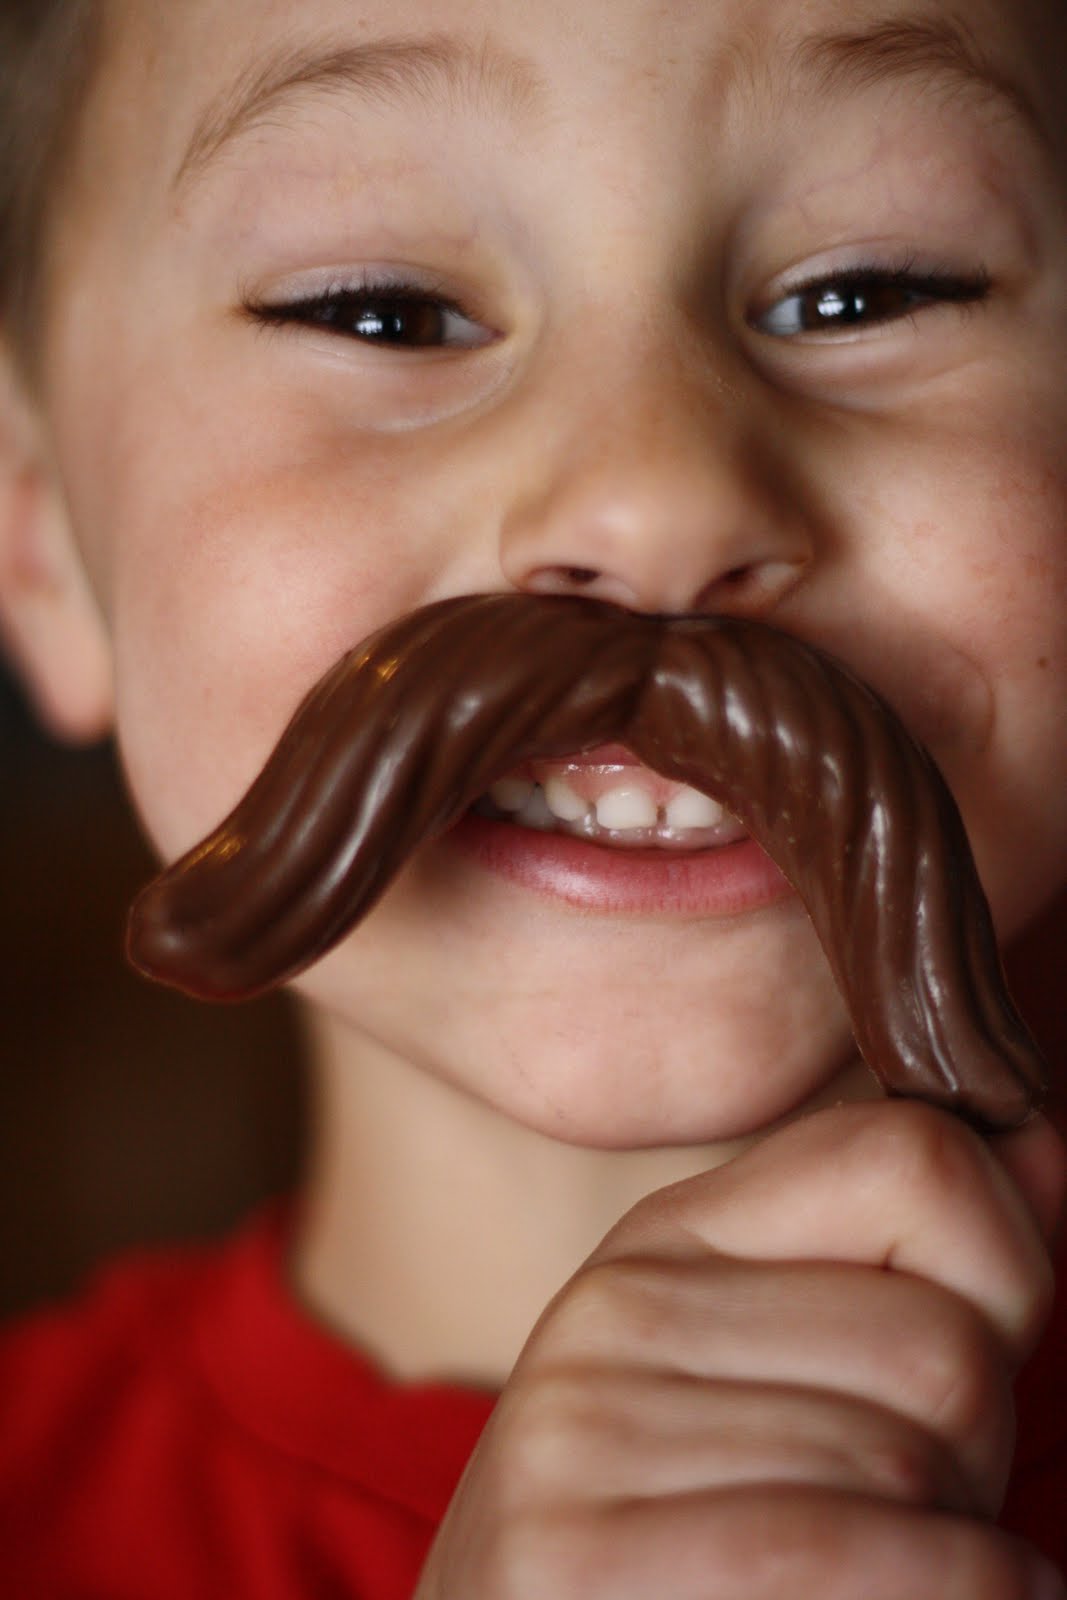
 Don't forget a few pictures.
 Then eat your heart out!
 Oh chocolate...
 Two year olds LOVE chocolate!
 Tah dah... cutest Valentine's and might even top last years!
FYI... It takes about 1oz. of chocolate per sucker if that helps when you calculate how much to purchase.... AND  any extra chocolate can be re-hardened and saved for later.  Just make a chocolate blob on a piece of wax paper and then stick it in the fridge for a few minutes.  Once it is hard, place it in a sealed bag and save for later.  The chocolate can be reused over and over.... oh SNAP isn't that awesome!
Making your own adorable mustache is super simple!... all you need is a piece of black felt and double sided tape.  Click HERE to view a pattern assortment.
Don't forget to enter my giveaway!!!

Tuesday, January 10, 2012

Personalized Valentine's...so cute and so easy!

Okay so I didn't come up with the idea on my own... however I did take credit for being soooo "creative" and "crafty."  Last year the kids sported super fun Valentine's.  At the bottom of this post are a few tips on creating your own.


Last year I did these really last minute, and still they were adorable.  Start by taking several photos of your child holding their hand out in a fist.  Make sure they get it away from their face a little.  Next you will need some sort of photo editing software so you can crop your photo and apply text.  I recommend downloading.Picasa if you don't have one.  It is free and very user friendly.
Crop your photo and apply text if you so wish.  Then upload to a photo printing service that offers wallets.  I ordered a few extra and sent to Great Grandmas and such.
I just used a knife and slit little holes in the photo at the top and bottom of each child's hand.  Then slide the sucker through.  You could also give pencils, pixie sticks, balloons... you name it!  So fun!!!

Thursday, November 17, 2011

Happy Turkey Day!

The older I get, I feel like times passes by faster.  Some days I can't even remember what it was like with just one kiddo or what they were like as a baby.  So I'll take out a photo book to help me remember.  I love this little hand print turkey done by my 4-year-old and maybe it'll help me remember his precious little hand for the next 30 Thanksgivings.  He loved it too!  He wanted to make 50 of them.  He thought we should send one to his grandmas and great-grandmas.  Well guess what?  Shockingly I didn't get them sent but we still had fun creating.  We used craft paint and I sponged it onto his little hand one finger at a time.

Thursday, July 21, 2011

Homemade Play Dough made with Kool-Aid...Kid Craft

It feels like the summer is flying by and the kids are a little restless some days because playing outside when it is 106 isn't all that much fun... unless water is involved. Yesterday we decided to make our own fun with homemade play dough using kool-aid. This was fun and it smells sooooo good. We did lemon-lime and orange...

And look... finally a practical use for these lovely little cutters from the Pampered Chef, which have just been taking up drawer space for the past 5 years:)

Fun was had by all and it was something we did together and there was no fighting, or tattling, or screaming, or anything except laughs and good times.

Kool-Aid Play Dough
1 cup flour
1/2 cup salt
3 Tbsp. oil
1 pkg. Kool-Aid powder
1 cup boiling water
Stir together the flour, salt, and Kool-Aid powder in a bowl. Add the bowling water and oil. Stir and stir and stir until the mixture forms a ball. Gently knead a couple of times then set aside to cool down. We used empty cottage cheese containers for storage and tomorrow the kids want to decorate those... so we now have another project:)


Wednesday, April 6, 2011

I♥Easter...At Home With K

I do a lot and I mean A LOT of blog searching lately. The weather is almost nice enough to tear into things outside however not quite... so while I oh-so-patiently wait I search and search for MORE projects... once in awhile I begin to feel a little guilty and then I search a little longer, pretending that I'm searching for kid crafts or something... ( in reality my kids are all a little small for projects except the one in kindergarten, oh that and I have NO patience as a preggo-lady) However in my latest searches I discovered a great blog and we are from the same great state of NEBRASKA.. click the image below to check it out.

I've only done minimal decorating for Easter and so I was in search of some fun egg projects... I found one that didn't even require me to purchase supplies and is so cute... and I suppose if I do some deep-breathing the kids can probably help:) Check it out below...

Egg Tutorial after you click the egg tutorial link you'll have to click another link because Kindra did a guest post at Chicks Dig Deals Have a Happy Hump Day!!!

Friday, April 1, 2011

Dyeing Easter Eggs... Gotta Try This!

I am the type of person that gets my hair cut twice a year and hadn't changed my style in 8-10 years... my sister-in-law became a stylist and started working at a nice little salon here in our small town. She encouraged me to try a few new things, including highlights. I called down to the salon one day to schedule an appointment to get my hair "dyed" again. This sweet little southern receptionist answers and explains, "Honey you dye easter eggs, I will schedule you for a color." okie dokie... Now that I know the difference let us all have some fun and dye some Easter Eggs this season. We'll leave the coloring to the professionals:)

Dyeing Easter Eggs is meant to be fun... this year try these different techniques as illustrated on Amanda's blog "Crafts by Amanda" The link is below the picture... so cool! Crafts By Amanda~ 7 Easter Egg Techniques (Click Here)

Saturday, March 19, 2011

Spring Flower Kid Craft Tutorial

I saw this adorable craft on the BHG website a few weeks ago and Eli and I decided to give it a try this afternoon while the little ones were napping:) So easy and cute... here is what you need

1. Several empty toilet paper rolls (not hard to come by around here:)
2. BBQ skewers
3. Tissue Paper
4. Paint and brushes
5. Hot glue
5. Scissors, pen
6. Green cardstock or construction paper
7. Piece of foam (helps if you don't paint the skewers ahead of time)
Draw horizontal lines every 1/2 inch or so across the roll and then guestimate the center and draw and 1/2 inch circle there


Cut each line up to the ring in the middle... do not cut all the way through


Bend each cut toward the center... do this for both sides


Your sweet TP flowers should look like this...


Hot glue the "flaps" or pedals from each side to one another

Kinda looks like a sun...

Poke the BBQ skewer through the center and put a dab of hot glue at each end to keep it from spinning...
Also take a little green cardstock and give it a little dimension with different greens to make leaves

Turn the kids loose with paint of their choice of course...

After the paint is mostly dry, crumble up little pieces of tissue paper and glue them in the center of the flower...

Using the foam for balance.... paint the stems green and allow to dry... then hot glue the leaves on each flower... and there you have it... ADORABLE