Tuesday, July 26, 2011

Tuesday's Recipe...Beef Enchiladas

Yikes... don't gag after you look at the first picture:) Haha... this is more of a kid friendly enchilada casserole... and I must say, my kids love it... the picky hubby will eat it hot, but not leftover:( Actually the only thing he eats leftover is steak... his mother is so proud!
Combine browned ground beef, onion, enchilada sauce, cream of mushroom, milk, and green chilis in sauce pan... heat till bubbly.
Next, you will layer like a lasagna. Start with a little of your beef mixture on the bottom, then tear up tortillas, then more beef mixture, then shredded cheese... do this until the beef mix is gone. Top with remaining cheese and bake. Recipe at the bottom.
Recipe

1 pound ground beef
1/2 onion diced
1 can of cream of mushroom soup
1 can of mild enchilada sauce
1/2 cup milk
1 can diced green chilis (or fresh)
1 package shredded cheddar cheese
4-6 tortillas

-Bake at 375 for 30 minutes (This makes a 9 x 9 pan, if you want a 9 x 13 you should double everything, except I think one package of cheese is plenty even for the 9 x 13)
Serve with corn chips.

Thursday, July 21, 2011

Homemade Play Dough made with Kool-Aid...Kid Craft

It feels like the summer is flying by and the kids are a little restless some days because playing outside when it is 106 isn't all that much fun... unless water is involved. Yesterday we decided to make our own fun with homemade play dough using kool-aid. This was fun and it smells sooooo good. We did lemon-lime and orange...

And look... finally a practical use for these lovely little cutters from the Pampered Chef, which have just been taking up drawer space for the past 5 years:)

Fun was had by all and it was something we did together and there was no fighting, or tattling, or screaming, or anything except laughs and good times.

Kool-Aid Play Dough
1 cup flour
1/2 cup salt
3 Tbsp. oil
1 pkg. Kool-Aid powder
1 cup boiling water
Stir together the flour, salt, and Kool-Aid powder in a bowl. Add the bowling water and oil. Stir and stir and stir until the mixture forms a ball. Gently knead a couple of times then set aside to cool down. We used empty cottage cheese containers for storage and tomorrow the kids want to decorate those... so we now have another project:)


Wednesday, July 20, 2011

Potty Training Ideas with Potty Treats

I am loving this idea I of course found in blogland. My 2-year-old is really getting the hang of it now. Right before she turned two she was doing great with the potty training thing, except I was nine months pregnant and didn't put my whole heart into it... and I'm a softy with this child because she is just so sweet. (every family has the "sweet one") This is probably why she also still has a pacifier, even though I swore my kid would never have one past one and totally shamed others that had older kids with them. (life and kids usually make you regret saying... "my kid will never..." trust me your children will live to prove you wrong if ever utter those words, I promise!) Anyhow, she started and then totally stopped after baby number 4 came. Once we tried again, 6 weeks later, she was just a little more stubborn.
Plan B... the bribes pictured below. My little one loves chocolate and so instead of asking her to pee, because that is an instant "no" I say, "do you want a potty treat?" and she heads for the bathroom. We are not 100% but we are getting there day by day. (To my sister-in-law, Katie... for Lincoln, your gonna need a jar filled with either icees or tractor stickers...lol)
To make the beauty pictured below I used an empty pickle jar, some ribbon, scrapbook paper, paper flowers, and hot glue... as well as M&M's:)
Just to keep real here in blogland and prove that I'm human, and hypocritical I would love for you all to see my 2-year-old and her pacifier, which she calls her "assy" sitting on the toilet. (She can say pink and she can say please, but still prefers to say assy... sounds lovely in church)

Tuesday, July 19, 2011

Tuesday's Recipe...White Birthday Cake Recipe

This is hard to believe but I now have a 7-year-old...yikes, I was 18 yesterday, or so it feels. In an effort to be Suzzy Homemaker or Betty Crocker, I have decided to make all of my kids' birthday cakes. We have a great cake maker in town, but I just want to DO IT MYSELF... surprise surprise. I have a couple of great chocolate recipes but my little angel wanted white this year... I found a great recipe on AllRecipes.com and even though I messed it up a little, it was still a success, especially with seven 7-year-olds. Before we had cake, the girls got their hair styled and pedicures. (Well they soaked their feet in hot water, got lotion, and polish) They loved it! It could not have been feasible without my wonderful sister-in-law(and the salon she works at), my sister, and her friend, Megan.
Above my daughter is so pleased, it is FINALLY her day. Only 365 more days until the next "special day."
As party favors, I made each girl a headband, since it was a "spa day" themed party.
Okay, for the recipe since this is supposed to be a recipe themed post. Super easy cake and since she is almost a little firecracker most of her cakes have been patriotically themed. For the star and seven, I printed off a star shape and a 7 on computer paper. I cut them out, making a stencil and then used blue and red sprinkles to create the lovely cake decor. This recipe was super easy and I accidentally used one extra cup of butter. (I know I'm an idiot but I have 4 children now and that makes me practically brainless) Anyhow, even with an extra cup of butter it was still pretty good. Enjoy! BTW... I doubled the recipe for a two-layer 9-inch cake.
White Cake Recipe
Ingredients
1 cup white sugar
1/2 cup butter
2 eggs
2 teaspoons vanilla extract
1 1/2 cups all-purpose flour
1 3/4 teaspoons baking powder
1/2 cup milk
Directions
Preheat oven to 350 degrees F (175 degrees C). Grease and flour a 9x9 inch pan or line a muffin pan with paper liners.
In a medium bowl, cream together the sugar and butter. Beat in the eggs, one at a time, then stir in the vanilla. Combine flour and baking powder, add to the creamed mixture and mix well. Finally stir in the milk until batter is smooth. Pour or spoon batter into the prepared pan.
Bake for 30 to 40 minutes in the preheated oven. For cupcakes, bake 20 to 25 minutes. Cake is done when it springs back to the touch.

Wednesday, July 13, 2011

Onesie Dress Tutorial

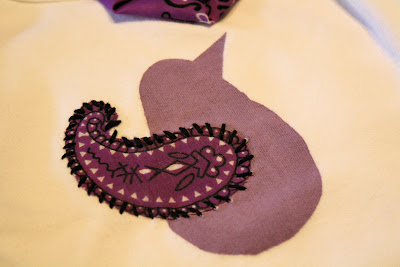
I had to share this "homemade" baby gift I made for my newest niece. I found lots of tutorials on onesie dresses but kinda just made it up as I went. The skirt is just a colorful handkerchief sewn to a plain white onesie. You can find a good tutorial HERE. Thanks to the super cool blog Running With Scissors. I thought this would make a perfect outfit for county fairs since it is that time of year.

The matching flower is a super cute accessory. I just added a little alligator clip to the back and now it can be added to any headband.
So cute and so easy... this will probably be the first of many I make:)
Linking up to...
Tatertots and Jello...
Sunday Showcase...
I Heart Naptime...
At Home with K...