Showing posts with label flower. Show all posts

Monday, November 28, 2011

Hanging Dress Hair Bow Holder Tutorial

I love little girls and all things girl.  It is so much fun to put fancy stuff in their hair and doll them all up in super cute duds.  I love decorating little girl rooms, and painting toes, and little girl photos, and dollies... AND thank goodness b/c I have three!  Below is a super long tutorial on how to make this cute hair barrette and clip holder.  It is a great addition to any little angel's room with a crazy OCD organize-happy freaky mom like me!

Supplies:
-8 x 11 piece of cardboard
- 15 x15 piece and 5 x 14 of cotton fabric and 15 x 15 piece of batting
- two coordinating pieces of ribbon at least 40 inches long each
-1.5- 2 yards of matching tulle (I used two colors @ 1.5 yards each)
- 4 old stud earrings
-hot glue and gun
-scissors
-minimal sewing skills and sewing machine with matching thread
-4 straight pins
-download THIS pattern


 For a great fabric flower tutorial click HERE!

Friday, April 29, 2011

DIY Decor with Flower Balls... and tutorial

I'm on a mission to post some of my "winter crafts." We did lots of remodeling this winter and since I couldn't clean I turned to crafting... which lead to blogging. These flower balls were one of my first finds in blog land and they are courtesy of House of Smith's... love that blog! Hopefully there are only a handful of days left inside... after that... and a 4th child of course... I may not keep up... until then I'll post my heart out! ... and it beats laundry, dishes, cleaning...ect.Place one or two of these anywhere... on a shelf, on the fridge, as a centerpiece... you can't go wrong... And thrift stores usually have oodles of candlestick holders, or if you are like me, go into your storage and pull out wedding gifts from 7 years ago:) I knew there was a reason I chose to keep them instead of re-gifting them:) lol...
Visit the link below to get the full tutorial on these beauties. All you need is crepe paper, hot glue, Styrofoam balls, and lots of patience... (I also saw a tutorial where someone used wiffle balls instead of Styrofoam which isn't a bad idea because I had to order mine from Hobby Lobby) Dollar stores have crepe paper and wiffle balls though... okay enough...Thank you House of Smiths for the great Tutorial
Come back soon... follow me... stay and take a look around... I have some great new posts in the works...
Click Here for a free mother's day printable.

Linking up to...
I Heart Naptime
Stories of A to Z
Simply Designing

Thursday, April 21, 2011

More Flowers and Flip Flops!

Remember that post where I was whining about living so far from everything... Maybe not:) Well I finally got online and ordered a few things... one, a new pair of flip flops, color gray. Yippee! Anyhow, I just wanted to show these cute little babies off. I took a relatively unattractive floral fabric and some pink/gold gemstone buttons, add them to a pair of blah Old Navy Flip Flops and what do you get? Tah dah... click the link below to view the tutorial of how to make your own. Instead of ribbon just use 3/8 inch strips of fabric and follow the instructions for the headband if you want a fuller flower.
Flip Flop Makeover Tutorial (Click Here)


Friday, April 8, 2011

Flower Tutorial and more...

My name is Tiffany and I am an addict... to fabric flower making that is... I do seriously have a problem as you can see from the collage below.... I'm sharing my latest masterpiece with blogland today. My mother also has an addiction... she spoils my kids with super cute outfits.

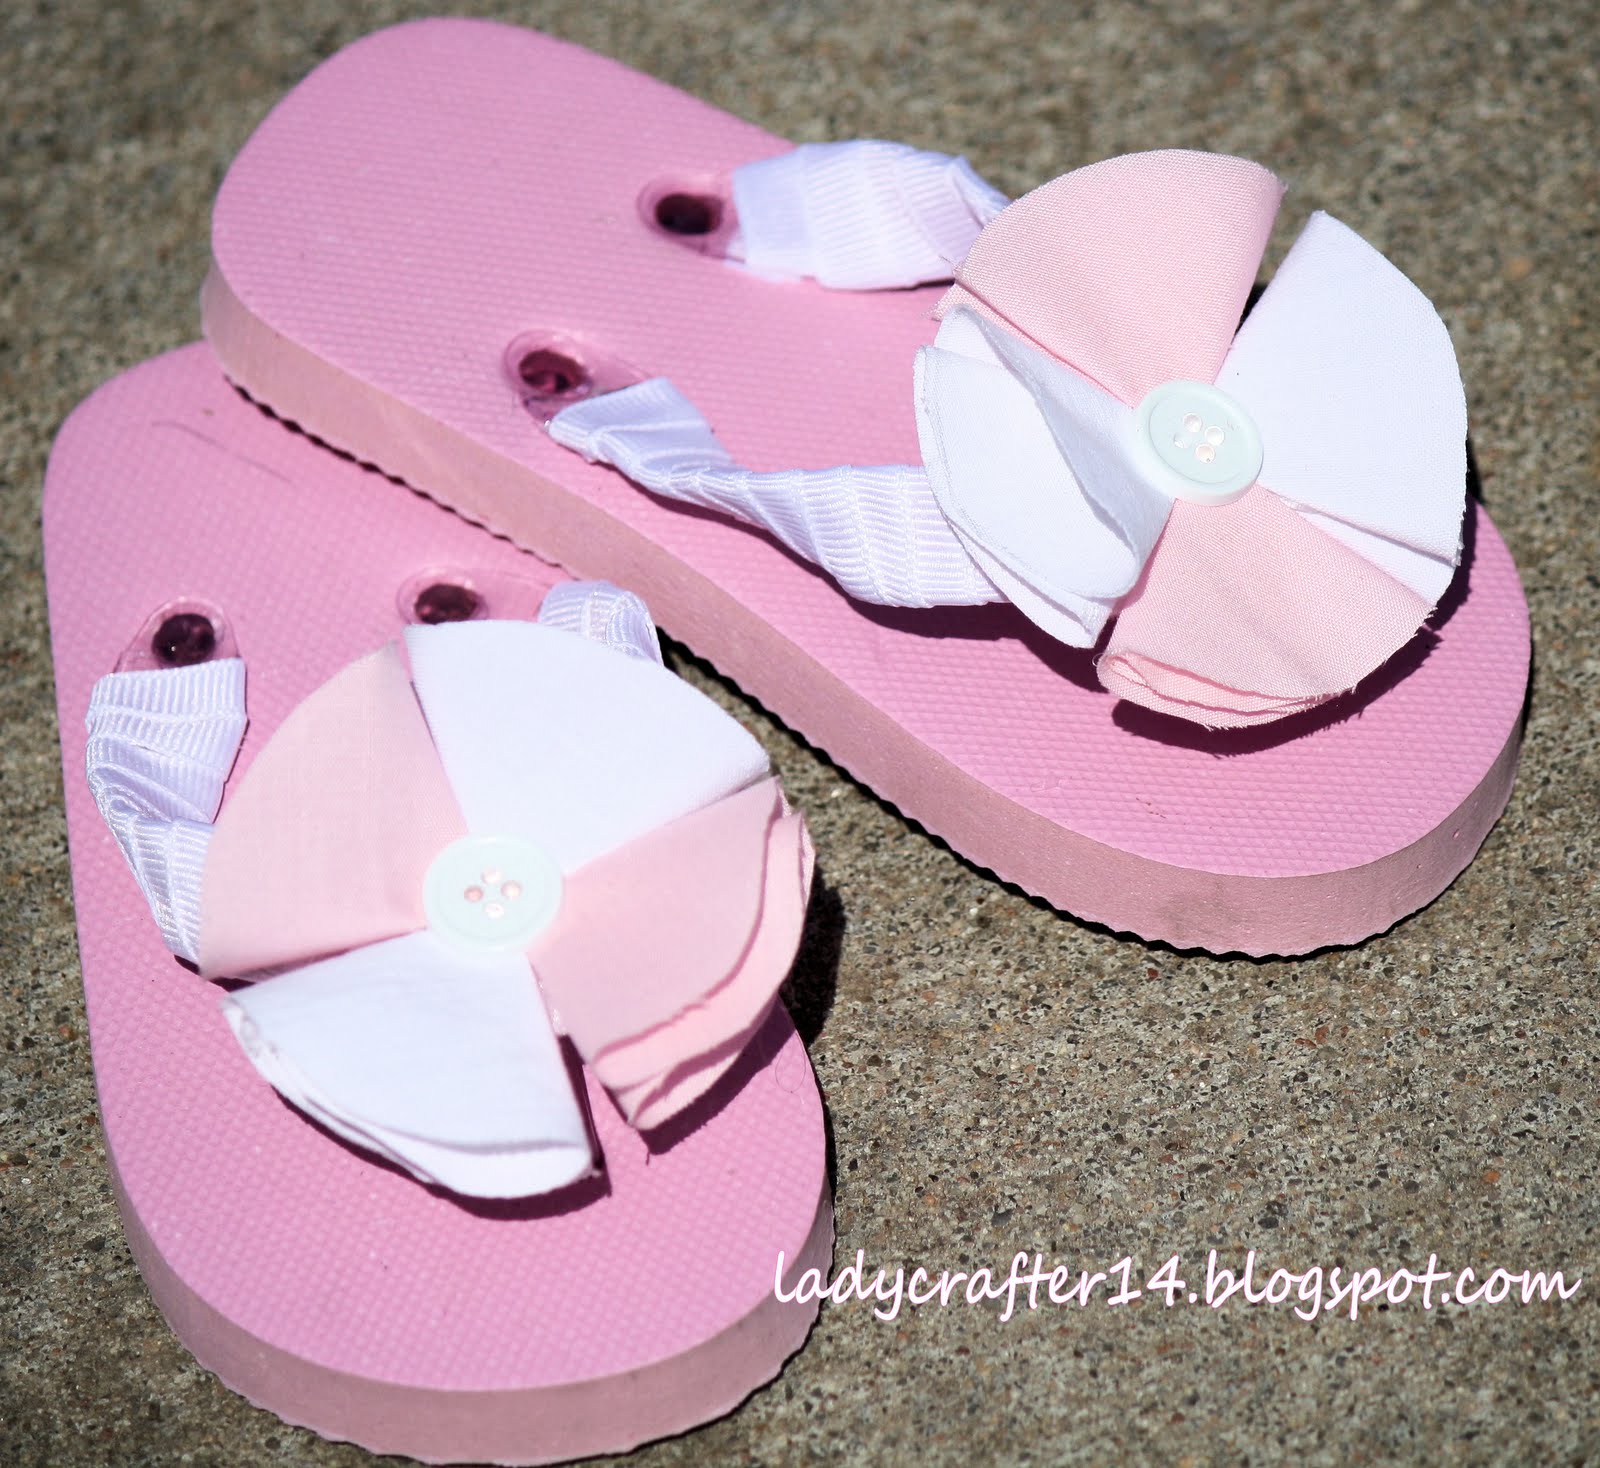
My niece's birthday is coming up and I wanted to accessorize her outfit, which matches the one my daughter is wearing at the bottom of this post... from www.kellyskids.com... I'm warning you... don't visit if you don't have deep pockets though... way too cute!!! You'll need a pair of flip flops (these are $1/pair at the dollar store) fabric, felt, buttons, ribbon, hot glue and scissors. To begin with... I traced around the lens cap of my camera and made a pattern. (For larger flowers trace around a larger circle, like a glass or jar lid).. these are for an almost-2-year-old and they are plenty big
For each of the shown flowers you'll need four circles... so stack and cut
Next cut a small piece of felt for each flower... about the size of a 50 cent piece
Take one circle at a time and fold in half like a taco...then fold again into a one-fourth, put a dab of hot glue in the middle when you fold the second time
take another dab of hot glue and place it on the felt, then adhere your fabric
repeat in whatever pattern you like...
for the flower's center, I chose buttons, but the variations are endless...
next you'll want to dress up that $1/pair of flip flops... start with some ribbon and begin wrapping the strap... as you go dab hot glue every little bit to make sure it stays. (Strips of fabric will also work instead of ribbon)
I used quite a bit of hot glue because this ribbon was thick... like every time I went around:)
This is what the wrapped straps will look like... next
cut two more small pieces of felt...
wrap those around the straps as well... use lots of hot glue and make sure the felt is glued to itself...this will keep everything secure once your toddler starts running in these puppies...
place a large dollop of hot glue on the finished flower and center it on the flip flop... make sure the felt of the flower is glued to the felt on the flip flop... this is a very secure bond... almost like gorilla glue.... seriously! Felt on Felt is very strong!
Tah dah... glammed up dollar store shoes!... I couldn't stop there though... I wanted to make a matching headband...
to begin I shrunk the pink flower size just a tad... but kept the white the same size as used for the flip flops
create a bottom layer with the slightly larger circles and then with the slightly smaller circles glue and place the new "petals" on the seams of the bottom layer
Isn't that such a pretty flower...
Just like with the flip flops wrap your headband in felt using quite a bit of hot glue
Place a large dollop of hot glue on the flower and secure it to the headband.
Ahhhh... isn't that sweet!

Photo shoot with Ladybug #3... she says "cheeseburger"
And the sweet little toes... just because...
Hope you enjoyed another LONG tutorial from me:) For a slightly larger flower and with more petals visit The House of Smith's Blog ... just click the link House of Smith's