I was having lunch with a friend today and saw this sign posted above the sandwich shop's kitchen... I literally laughed outloud and thought to myself I need to have that in my kitchen. I came home and created a printable...ENJOY!

Thursday, March 31, 2011

Wednesday, March 30, 2011
{April Fools}
Don't forget that Friday is the much dreaded April Fool's Day! I have a love/hate relationship with this "holiday." It can be hilariously fun if you are the prankster... not so cool if you are the prankee, which I tend to be:) I guess I'm just gullible... that and I never realize that it's April 1st until after I have been pranked. Here are a few fun ideas if you are drawing a blank:) Decorate a bowl or box with frosting. Put it on the counter or in the breakroom with a note that just says, "Enjoy."
 This classic trick is just too funny... put a rubberband on the button on the hand held sink nozzle. Whoever turns the water on next gets a little shower!...haha
  This one is for the office... Using Microsoft AutoCorrect settings, change a common word to something a little more evil:)
  Be a little funny and a little evil, not a lot!
 Pier 1 Inspired Butterfly Pillows... & Tutorial
Oh my, oh my... first let me begin by saying... I had every intention of going to Pier 1 and purchasing a set of butterfly pillows. Plans changed. I get to Pier 1 once maybe twice a year... not because I have great self-control but because the nearest Pier 1 is 3+ hours away and did you know you can't shop online... nope only browse...boo! On that tangent I pretty much live 3 hours from any type of home decor store, Hobby Lobby, ect. with the exception of a Walmart that is 61 miles away:) I'm not whining because I love living in the wide open windy prairie, however I'm thinking of starting a new blog called "Handicap Crafting" because I can't just jump in the car and run to Micheals or Sam's or anywhere even close... okay enough about that. On my once every year trip to the big city of Omaha I headed to Pier 1 for the adorable butterfly pillows and they were OUT! What... I was horribly disappointed and so to console myself I treated myself to a 5,000 calorie supper and started figuring out how to make my own. So here you have it... my knock-off simple version of those Pier 1 pillows that can be made to match any decor colors. Below you see a separate inspiration from the Pottery Barn... love it!
 And here below are the lovely pillows that were OUT! Me to the sales lady, "uhm... no I can't stop back in Thursday when you get your shipment."
  Drum roll please... tah dah! A little smaller and a lot less detail, but I DID IT MYSELF!
 Lets Start with supplies: -old pillows or pillow forms -plain fabric of some kind -sewing machine +needle and thread -freezer paper -knife and cutting mat -iron -craft paint -textile medium -butterfly, bird, branch, or animal copy of your choice (website link at bottom of this post)
I started with a really old curtain... had kind of a linen texture and my cheapo-used-up throw pillows that probably could have been burned, but they didn't stink:)  Since my curtain was a little yellow I tried to give it a more vintage/old look and tea-stained it first. (to do this: take 6-8 tea bags with 10 gallons of water or so depending on the size of your fabric, fill a bucket with really hot water and make a tea bath... remove the bags and soak the fabric over night... then wash on cold and dry the fabric)
 Next you need to measure your pillows. Mine were 16 inches so I cut 16.5 inch squares. I cut 8 squares and doubled up my layers because I didn't want those ugly stripes coming through.
  Stacking all four layers for each pillow sew a 1/4 inch seam in 3 sides of the square. Then set aside and get ready to create your pattern/stencil.
  For this step you will need Freezer Paper (not wax paper), tape, a knife, and mat.
  The link for the butterfly pattern above is at the bottom of this tutorial. First tape the pattern to the mat and then tape down the freezer paper with the shiny side down.
  Next, very slowly and carefully begin cutting on your pattern. I only used the general shape of the butterfly and found it was easier to just free-hand the inside... okay, this takes a bit so put on some country music, make some hot tea and enjoy the mindless activity:)
  For the other wing, un-tape your pattern ( not the freezer paper stencil, set that aside) and flip it over. Tape it down and then place a second sheet of freezer paper on top with the shiny side down... oh and make a second cup of tea.
  Your almost to the fun part...
  So you should have two stencils that look like so...
 For the next step you will need paint of your choice and textile medium. The textile medium will allow you to wash or accidentally wet the painted area without damaging your design. The textile medium isn't a must for this project because you probably won't be washing your pillows however if you use this technique for a t-shirt or something you can wash it and the paint stays in place... great stuff...sold at Hobby Lobby.
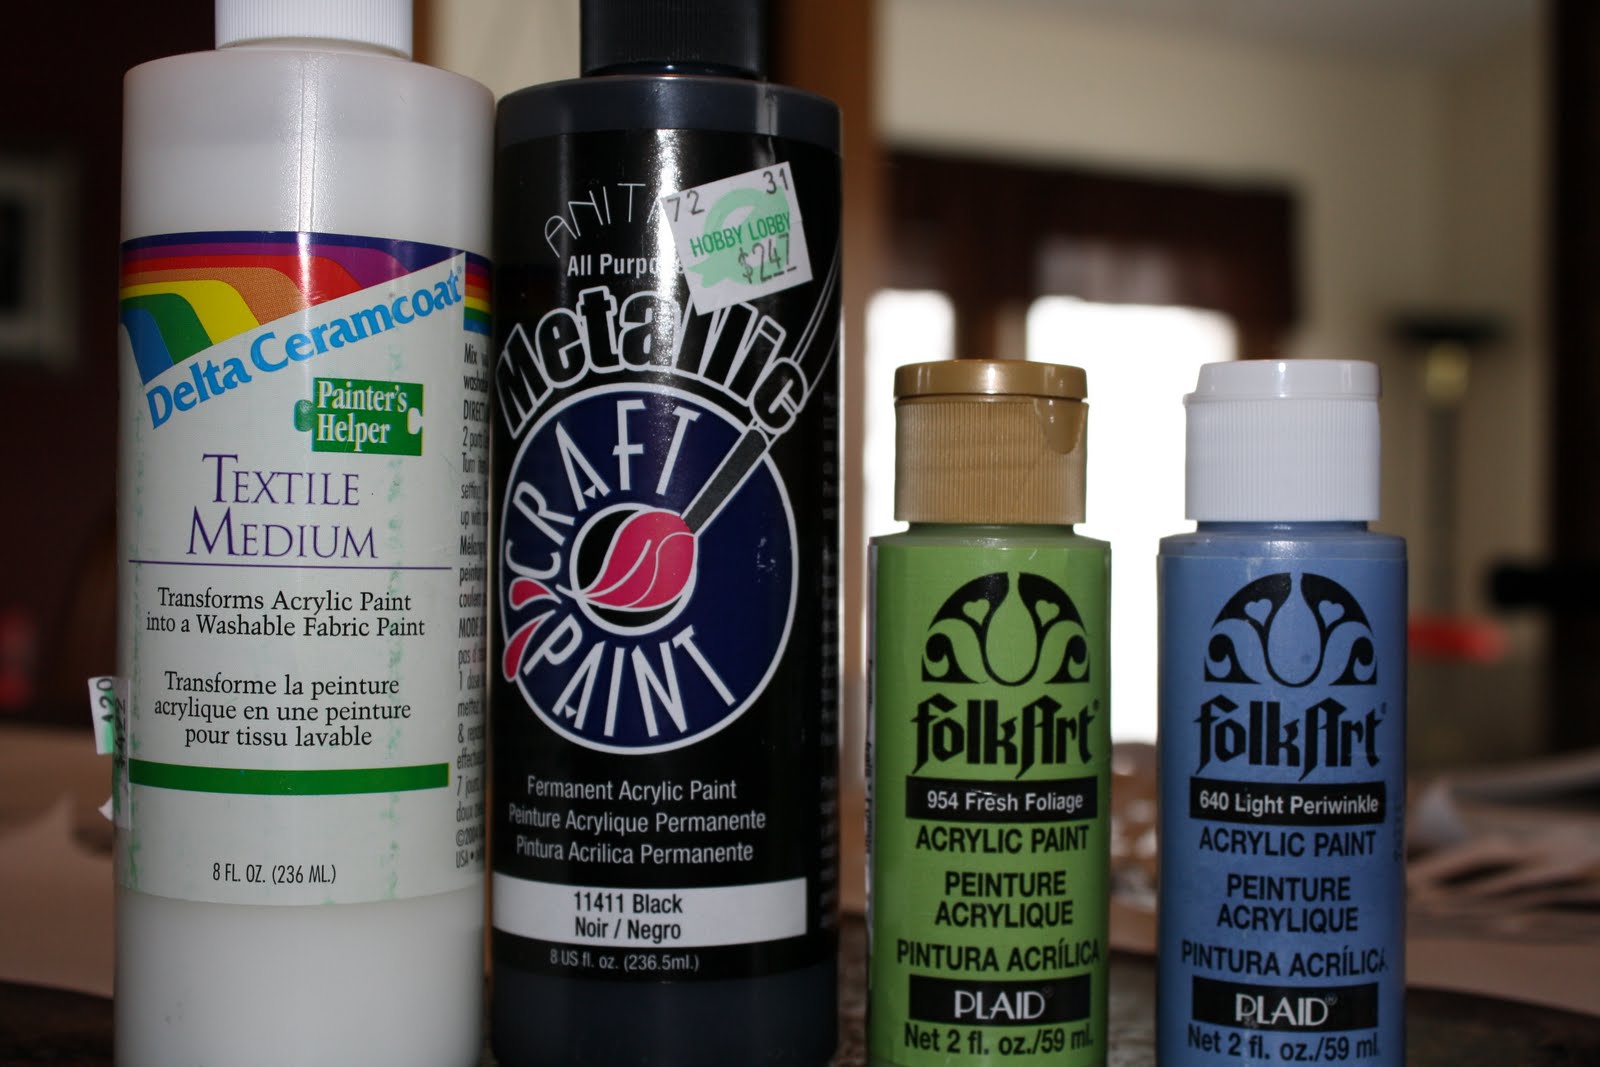 Quickly take a hot iron(no steam) to your pillow case and smooth out any wrinkles.
 Next prepare your paint... I thought this blue was a little too pastel so I added a dab of black.
 Add the textile medium to the mixture... 1 part textile medium, 2 parts paint.
 Now very carefully choose the position of your stencil. Don't align the butterfly right on the seam because it will fluff a little when you fill it. After you pick the position. Iron over the stencil with NO steam shiny side down. The wax melts to the fabric and creates a temporary bond.
 Your freezer paper should be bonded to the pillow case like this.
 Now go crazy with the paint and paint brush. Put on a single even layer.
 Wait only a few seconds or minutes and then gently peal the stencil away.
 Obviously you have to repeat with the other side and other color:)
 Be sure to match the position on the pillow with the first one so the wings align when sitting next to each other... the paint needs 5-6 hours to dry:)
 Now stuff those yucky recycled pillows in their new home.
 Fold all four edges in and pin.
 Pour some more tea and begin sewing the seam by hand with your needle and thread.
 Isn't that beautiful!
 Changing my decor from fall burgandy to lovely blue and ivory spring!
 Even though Pier 1 was out of pillows, they did have these beauties on sale which are just peferct for my new color scheme.
 Tah Dah!... gosh that was a really long post! Hope you enjoyed and if you have any questions please comment and I'll reply!
This post joined the link party at... 


Monday, March 28, 2011
Easter Subway Art
Those girls over at eighteen25 sure are crafty and I love subway art. Here is their Easter Creation. Click the link and it takes you to their blog. From there you can download the file and print at home or professionally!
Friday, March 25, 2011
Sweet Boy and His Tie T-Shirt
Since my oh-so-demanding 4-year-old decided to change his ways and become the sweetest little boy yesterday I must blog about his cuteness (hopefully this doesn't jinx his new attitude)... yesterday instead of throwing a fit about having to wear jeans, he came up dressed... instead of fighting me about how much tv he could watch, he insisted on going to the farm to help dad... instead of eating nothing for supper, he had seconds... at bedtime he asked me to please tuck him in 20 minutes before his bedtime... and the best part... this morning he told me I'm the best Mom Ever!!!... aw...I melted
In other news... the oh-so-sweet 1 year old may have just switched over to the "terrible twos" a couple of months early:(
okay... back to the post and the t-shirt tie... I'm not the first to come up with this and many people have done it better... I chose to do an applique with blue and white striped fabric on a black tee... so cute! I did a very quick white thread zigzag stitch for a finishing touch and it is ADORABLE... Sorry no close-ups though (I know, what was I thinking?)... this shirt went to the preschool for a silent auction that is going to be held tonight:) At the bottom of the pictures find the links for my pattern and other t-shirt tutorials...Enjoy and Happy Friday!!!


~From the awesome blog "Crap I've Made"~
Appliqued Tie Tutorial
Appliqued Tie Tutorial
Wednesday, March 23, 2011
Girls Room Subway Art

Look out blogging world... I have figured out how to use my 6 month old paintshop program:) I have wasted most of the day trying to create new headers and signatures and let me just say... there is a reason people go to college for 4 years and get a graphic design degree... these programs can't read your mind... unfortunately:)
For my first design I recreated a better version of the art I made for my daughter's room... ( the first time I used Paint, yes the program you let your 5 year old just mess around in:) None-the-less, here it is and I can't wait to create my very own with each season or mood or whatever... hah! Love It!!!
For my first design I recreated a better version of the art I made for my daughter's room... ( the first time I used Paint, yes the program you let your 5 year old just mess around in:) None-the-less, here it is and I can't wait to create my very own with each season or mood or whatever... hah! Love It!!!

hopefully by clicking above you can download your very own 8 x 10
Tuesday, March 22, 2011
Vintage Inspired ~Short-Billed~ Hats
I wish I knew the actual name, if such a thing exists, for these short-billed hats. They are so cute and I still feel like a woman wearing one, as opposed to a TomBoy:) If someone knows the name... feel free to comment! Anyhow these are just a couple I created last week while the little angels were napping. 


Saturday, March 19, 2011
Spring Flower Kid Craft Tutorial
 I saw this adorable craft on the BHG website a few weeks ago and Eli and I decided to give it a try this afternoon while the little ones were napping:) So easy and cute... here is what you need
1. Several empty toilet paper rolls (not hard to come by around here:)
2. BBQ skewers
3. Tissue Paper
4. Paint and brushes
5. Hot glue
5. Scissors, pen
6. Green cardstock or construction paper
7. Piece of foam (helps if you don't paint the skewers ahead of time)
 Draw horizontal lines every 1/2 inch or so across the roll and then guestimate the center and draw and 1/2 inch circle there
Cut each line up to the ring in the middle... do not cut all the way through

Bend each cut toward the center... do this for both sides

Your sweet TP flowers should look like this...

Hot glue the "flaps" or pedals from each side to one another
 Kinda looks like a sun...
 Poke the BBQ skewer through the center and put a dab of hot glue at each end to keep it from spinning...
 Also take a little green cardstock and give it a little dimension with different greens to make leaves
 Turn the kids loose with paint of their choice of course...
 After the paint is mostly dry, crumble up little pieces of tissue paper and glue them in the center of the flower...
 Using the foam for balance.... paint the stems green and allow to dry... then hot glue the leaves on each flower... and there you have it... ADORABLE
Subscribe to:
Posts (Atom)